When I decided to make my own curtains for the first time, I stood frozen in the fabric store, completely overwhelmed by the endless options. Should I go with cotton? Linen? Something heavier? After much trial and error (and yes, a few regrettable purchases), I’ve learned that choosing the right fabric makes all the difference between stunning window treatments and disappointing drapes that don’t hang quite right.
Whether you’re looking to save money, create something unique, or just enjoy the satisfaction of a DIY project, selecting the perfect fabric is your crucial first step. Let’s dive into everything you need to know to make your DIY curtain project a success!
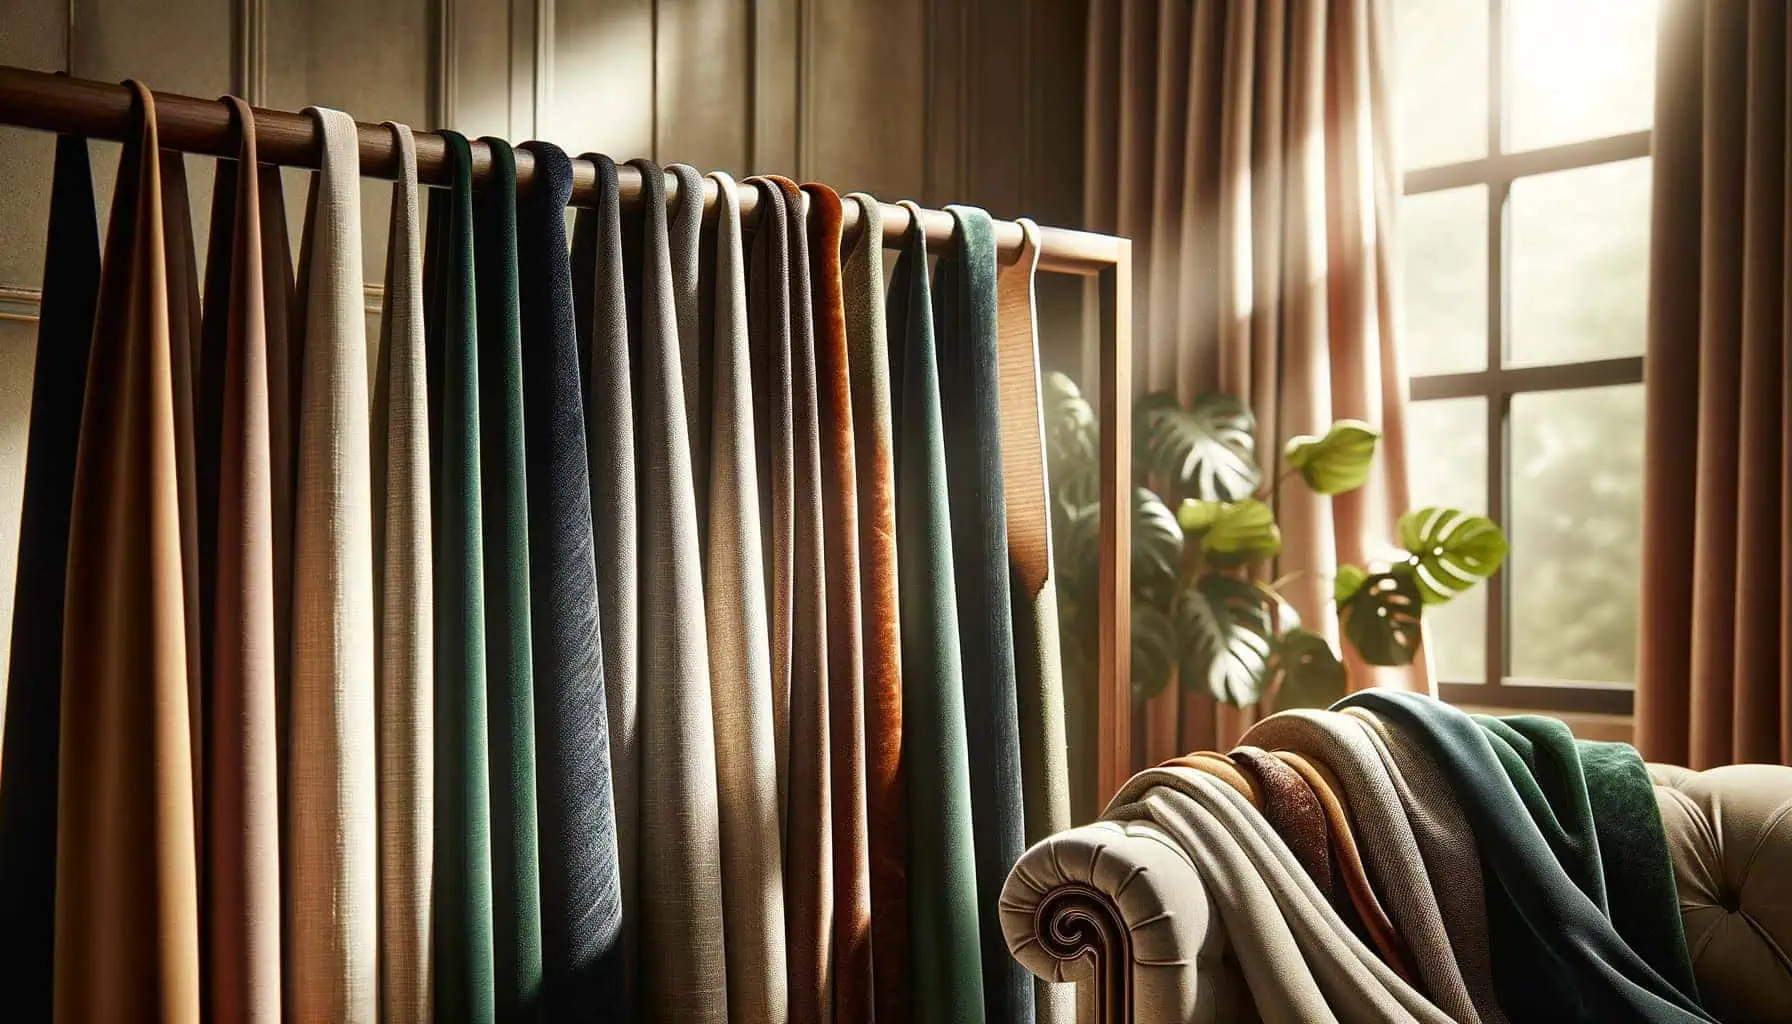
Understanding Fabric Types: Pros and Cons
Not all fabrics are created equal when it comes to window treatments. Each type brings its own personality and practical considerations to your space.
Cotton is my go-to recommendation for beginners. It’s affordable, widely available, and comes in countless patterns and colors. Cotton curtains diffuse light beautifully while still providing decent privacy. I used cotton for my kitchen curtains, and they’ve held up remarkably well over the years. The downside? Pure cotton can wrinkle easily and may fade in strong, direct sunlight over time.
Linen offers that effortlessly elegant, slightly rumpled look that’s currently trending in home décor. Its natural fibers allow for excellent airflow while still filtering light. However—and trust me on this—be prepared for some maintenance. My living room linen curtains look stunning but require regular ironing to keep them presentable. Also, quality linen isn’t cheap, so it’s an investment.
Velvet creates an instant sense of luxury and drama. I installed velvet curtains in my home office last winter, and they transformed the space while providing excellent insulation. The fabric’s weight means it hangs beautifully with minimal effort. The catch? Genuine velvet requires professional cleaning, and even synthetic velvet attracts dust like a magnet.
Sheer fabrics like voile or organza create an ethereal, light-filled ambiance but offer minimal privacy and sun protection. They work wonderfully as a layering piece behind heavier drapes or in rooms where privacy isn’t a concern. I’ve used sheer curtains in my dining room, and they create this gorgeous diffused light during dinner parties.
Polyester blends are the practical workhorses of the curtain world. They resist wrinkles, typically wash well, and don’t break the bank. Many come with built-in UV protection to prevent fading. While they lack the organic charm of natural fibers, they’re remarkably durable. My guest bedroom has had the same polyester curtains for five years with no visible wear—not bad for a budget-friendly option!
How to Match Fabric Weight and Window Needs
This is where I made my biggest mistakes early on. Fabric weight dramatically affects how your curtains hang and function, and it needs to match your specific window requirements.
For large windows, particularly those spanning from floor to ceiling, medium to heavyweight fabrics work best. The substantial material helps the curtains hang properly and create clean lines. When I tried lightweight cotton on my living room’s picture window, the curtains looked flimsy and disproportionate. Switching to a medium-weight linen blend made all the difference.
Small windows, on the other hand, can be overwhelmed by heavy fabrics. A light to medium-weight material creates proportion and doesn’t visually shrink the window further. Bathroom and kitchen windows typically fall into this category.
Consider your practical needs too:
- For blackout purposes (bedrooms, media rooms), look for tightly woven, heavy fabrics or those with blackout linings. I added blackout curtains to my bedroom and suddenly realized what true darkness feels like—my sleep quality improved dramatically!
- For temperature control, the denser the weave, the better insulation you’ll get. Double-layered curtains or those with thermal linings can significantly reduce heating and cooling costs. In my drafty old apartment, thermal curtains made winter nights much more comfortable.
- For sound dampening (urban settings or busy streets), velvet, heavy wool blends, or multi-layered options make a noticeable difference. My previous apartment faced a busy street, and thick curtains reduced the traffic noise considerably.
Don’t forget to consider the curtain header style too. Rod pockets work well with lighter fabrics, while pleated headings need more structure from medium to heavyweight materials to maintain their shape. For my dining room’s pinch-pleat curtains, I learned this lesson the hard way when my first attempt with lightweight fabric resulted in sad, droopy pleats instead of crisp folds.
Color and Pattern Selection for DIY Drapes
Choosing colors and patterns for curtains can be surprisingly tricky—they occupy a lot of visual space in a room!
When selecting colors, consider how they’ll interact with changing light throughout the day. I once chose a beautiful navy fabric that looked rich and sophisticated in the store but appeared almost black once hung in my north-facing room. Natural light drastically affects how colors read, so test swatches in your space before committing.
Here’s my general approach to color selection:
- For longevity, neutral tones like ivory, beige, gray, or navy provide versatility as your décor evolves. My neutral curtains have survived three different wall colors and numerous furniture arrangements.
- For impact, bolder colors can define a space—just ensure they complement your existing color scheme. A pop of color in curtains can eliminate the need for additional accent pieces in the room.
- For small spaces, lighter curtains maximize light and create a sense of airiness. Dark curtains can make a small room feel cozy but might also make it feel smaller.
As for patterns, scale matters tremendously. Large patterns make a statement but can overwhelm a small room. I once made curtains with a massive floral print for my compact guest room, and it felt like the flowers were literally taking over the space! Conversely, tiny patterns might disappear from a distance in larger rooms.
If you’re nervous about committing to patterns, consider these approaches:
- Use patterned curtains in a room with mostly solid-colored furniture
- Choose a pattern that incorporates colors already present in your space
- Start with a subtle pattern like a tone-on-tone stripe or small geometric design
Remember that curtains hang in folds, which will break up any pattern. That gorgeous central motif you love might get lost in the pleats—something I wish I’d considered before making my living room curtains!
Fabric Care: Maintaining Durability and Appearance
The perfect curtains can be a significant investment of time and money, so protecting that investment is crucial.
First, pre-wash all washable fabrics before sewing. I cannot stress this enough! My first DIY curtains shrank dramatically after their first washing, leaving them embarrassingly short. Cotton can shrink up to 10%, so pre-washing prevents future disaster.
Consider your long-term cleaning plans when selecting fabric:
- Machine-washable options (cotton, polyester, some linens) offer the easiest maintenance. I’ve found that curtains in kitchens and children’s rooms benefit enormously from being machine washable.
- Dry-clean only fabrics (velvet, silk, wool) look luxurious but involve ongoing maintenance costs. Ask yourself realistically how often you’ll actually take them to be cleaned.
- Specialty fabrics with treatments (blackout linings, thermal coatings) often have specific care requirements. Read manufacturer guidelines carefully.
To extend the life of your curtains, rotate them periodically if possible. Sun damage is cumulative, and rotating curtains helps them fade evenly rather than just in exposed areas. I switch my living room curtains from left to right every six months, and it’s remarkable how much it’s extended their lifespan.
Vacuum curtains regularly with a brush attachment to remove dust—especially important for allergy sufferers. For washable curtains, a gentle cycle every 3-6 months (more in dusty areas or for smokers’ homes) keeps them fresh.
Consider fabric protector sprays for light-colored curtains in high-traffic areas. When my friend’s toddler visited with grape juice, I was thankful I’d treated my cream curtains with stain repellent!
Bringing It All Together: Making Your Final Decision
After all these considerations, how do you make your final choice? Here’s my practical approach:
- List your non-negotiable requirements first (blackout, washable, budget, etc.)
- Collect fabric swatches of your top contenders and live with them in your space
- Consider the entire room, not just the windows in isolation
- Factor in seasonality if you plan to keep these curtains long-term
- Don’t forget about hardware compatibility with your chosen fabric weight
Remember that DIY curtains are a substantial project. I’ve found it’s better to wait for the right fabric than to compromise and end up redoing everything six months later. My most successful projects have always been those where I took my time with material selection.
I hope these insights help you navigate your fabric selection journey! Well-chosen curtains transform a house into a home, and there’s something particularly satisfying about pointing to beautiful window treatments and saying, “I made those.” If you found this guide helpful, please share it with your fellow DIY enthusiasts. Happy fabric hunting!